I always dress my tables with décor that enhances the experience or theme of my events. Here are a couple easy, affordable ways to create floral centerpieces for a meal or to bring a little brightness into the home depending on the season or the theme. For the Spring/Summer consider creating reusable, lasting floral arrangements like pictured below. They make great gifts for friends or family members too.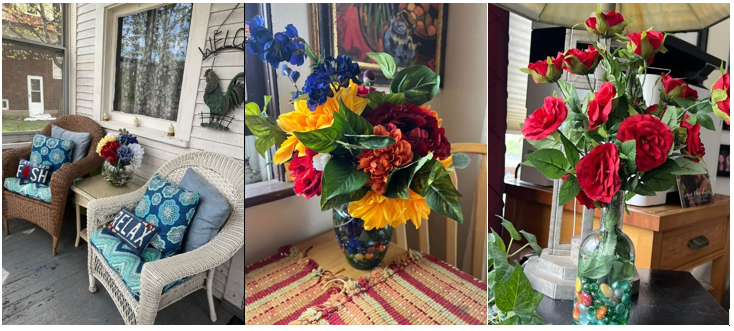
I want to give credit where credit is due because this is not an original idea although I’ve used fresh and silk floral arrangements in my decorating for events my entire adult life but for this idea, I watched a DIY video on Facebook. There are so many creative people out there with ideas on the Internet these days between YouTube and Facebook DIY videos or Pinterest and I want to share; I learned how to make these beautiful floral arrangements from watching a video on Facebook posted by Janelle Flom. She demonstrates many DIY creative food and décor how to videos. I found her beautiful indoor realistic looking silk floral arrangements exceptional. Here is what you need to create your own:
- Glass or plastic clear vase, bowl, or bottle.
- Silk flowers and greenery of your home color design palate or flowers of kind and color you like.
- Elmers or other brand of Clear Glue.
- Rocks, shells, or colorful stones.
All ingredients can be found at Michael’s ors Hobby Lobby craft stores.
1) Pour Clear glue into your clear vase, bottle, or bowl about 1/4- 1/2 way full. Keep in mind as you add the rocks and/or stones, the glue will rise.
2) Drop rocks or stones into the glue. Ensuring the glue level is above the rocks and will look like your arrangement has water in the vessel you choose. The rocks/stones will drop to the bottom and make a beautiful base to your design. Ensure, glue level is above the rocks to appear like your arrange is half full of water.
3) Ensure your silk flowers are the length you desire for your arrangement as once the glue sets, you won’t be able to remove or reinsert. Silk flowers are adjustable with cutting or bending marks. It is easiest with wire cutters.
4) Insert flowers into the glue and rocks/stones in an arrangement of your design and desire. The rocks/stones will help serve to hold arrangement in place until glue sets. Until set, you can rearrange until it looks just as you like.
For an elegant fall arrangement, again I looked to the Internet and this time saw many similar ideas on Pinterest. I searched for fall table décor and saw images of ideas I wanted to replicate. I cannot site anyone idea because I created my own from a little bit of several ideas I saw.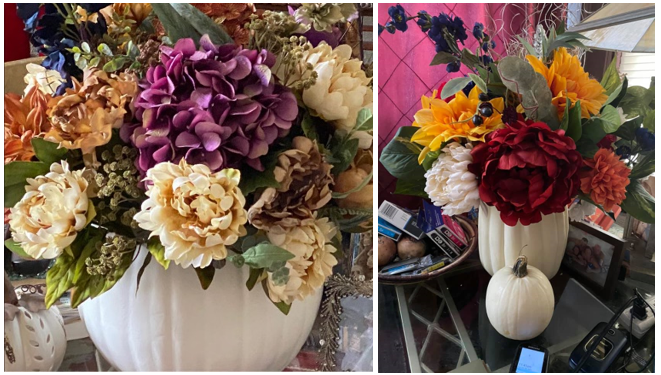
Easy fall table decor.
1) Slice the top off a Styrofoam pumpkin. You can get Styrofoam pumpkins at Michaels or Hobby Lobby. Use a serrated knife.
2) Select fall colored silk flowers and greenery. Insert stems into Styrofoam until top is covered, arranged decoratively, balanced and eye appealing.
3) Arrange with smaller pumpkins either real or Styrofoam around base.
4) You can add silk or real decorative leaves around base as well to further pull the fall theme together.
Fall offers so much beauty and the Styrofoam pumpkins help create dazzling table décor for special events. When decorating for an event, identify the colors and theme. Pictured below just happened to be an event I hosted for a wedding engagement party. I wanted it to be elegant and thought gold and white were the perfect colors. I couldn’t find gold leaves in any of the craft stores. I did however find packs of silk fall colored leaves. I bought gold paint and sprayed them gold. When things you find do not seem to be just right, I know this sounds cliché but, think outside the box and bring your idea to life.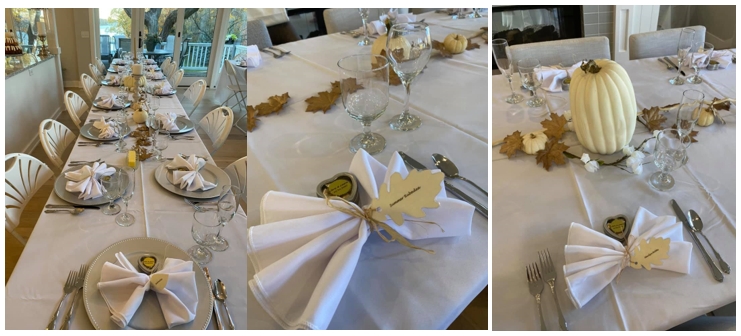
Edible holiday table décor that happens to make outstanding gifts as well.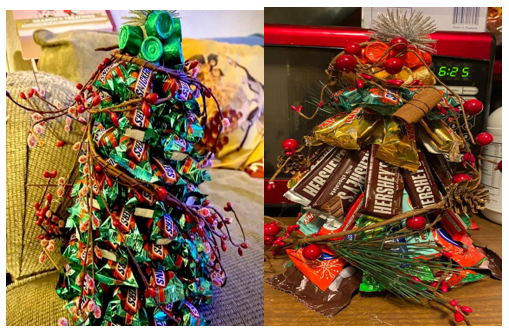 Items you will need (Craft items are available at Michael’s and Hobby Lobby):
- Styrofoam hot glue sticks
- Hot glue gun
- Wire cutters or utility scissors to cut the garland
- Styrofoam cones (Various Sizes make for a beautiful forest for the center of your holiday feast).
- Left over Halloween candy bars or you may purchase but the small size candy bars are easier to find around Halloween. (Each tree depending on the size of cone can take up to and sometimes more than a single bag of candy to fully fill the tree so no empty spots are showing). At Holiday time, the candy companies package their candy bars in holiday colors but not necessary to create beautiful trees. You can choose to have all one kind of candy like the Snickers tree with Rolo’s at the top or utilize various kinds of candy bars like the other tree pictured.
- Various holiday garland, strand of beads, strand of tinsel.
- Holiday bouquet arrangement décor – See picture, the star burst at top of tree was a bouquet of many starbursts and pulled them off to create individual starburst for top of tree. I have used bouquets of colorful balls. You can usually find them in bins around the holidays where you will find the garland at Michael’s or Hobby Lobby. You can put anything you’d like at the top to finish the tree. You can even sometimes find a bouquet of stars.
Directions:
Garland and Tree Topper
1) Start from the bottom or wider base of the styrofoam cone, insert an end of the garland near the bottom of the cone, do not insert in the bottom because then it won’t sit evenly. Ensure it is inserted in what might be considered the lowest boughs of a tree.
2) Remove and then squirt hot glue into the hole you created then reinsert. Allow to set.
3) Wrap the garland around cone loosely as many times as you’d like and then measure to the top of the cone. Garland often has a loop on it and can be placed at top and your tree topper goes through the loop when inserted into top for attachment. If no loop, insert end into top with what ever you have selected to be the tree topper.
4) Leave hole empty and set aside tree topper and allow garland to lay away from the cone until you have glued all the candy bars creating the tree.
Candy Tree Boughs
5) Start at the bottom attaching the candy bars beginning with a candy bar to cover your garland insertion. Squirt hot glue on wrapper end enclosure. If you place glue directly on the candy bar you may melt the candy bar inside the wrapper. Try to avoid melting the candy.
6) Decide on your design of the candy, you can do all one kind of candy all around first lowest layer or you can alternate.
7) Glue each candy bar as close together as possible however ensure they lay relatively flat. You will notice slight gaps because the straight edge of the wrapper does not mold perfectly around the curved cone. Just get the candy bars as close together as possible.
8) Continue glueing candy bars in rings around the cone until completely covered. Start the next ring with the first candy bar of that ring between the two below so it covers the gaps and no cone shows through. Again, place candy bars as close together as possible but can lay relatively flat against the candy below it.
9) Once cone is completely filled to the top, you may find using some smaller candies like Rolo’s a nice touch to put a ring around the top since the candy bars leave a slight gap between each bar. See Snicker tree image above. With Rolo’s you will have to place glue on the bottom of the candy since there is no wrapper enclosure edge.
10) Gently wrap garland loosely around the outside of the candy bar boughs until it reaches the top.
11) Squirt glue into hole and then insert end of garland end and tree topper in the hole. Allow to set.